If you’re American and like a lot of Americans, you probably celebrated the Fourth of July in something like a stereotypical All-American style. There was family and friends and cookouts and parties and drinking and reds whites and blue everywhere, and of course fireworks.
I decided to go against the grain. I decided to remodel my bathroom. By myself. Why? Cause I’m insane.
The truth of the matter is that the assembly inside the toilet was broken so badly that the water wasn’t filling the tank so much as it was exploding out of the assembly, hitting the top of the tank, and thus leaking down the outside of the tank and onto the tile floor.
Know what else? Those tiles in the bathroom floor started to come up. Mainly around the shower. Since I knew I’d need to take the toilet off to replace the tile, and since I was about to take the toilet off to replace it, I figured I might as well just bite the bullet and redo the whole shabang.
(Caveat: I didn’t touch the tub, which is a vinyl wall tub built right into the sheetrock. I may be insane, but I’m not stupid.)
How’d it go? Short answer: not too bad.
Shorter answer: ouch. I haven’t been this sore in a long time. There was so much up and down, squatting, kneeling, hammer, sawing–I was popping Aleve like a madman.
The truth is, the job itself is not so complex that you can’t wrap your head around it. In a nutshell, it’s just a series of basic steps:
- Remove old toilet
- Remove old tile
- Remove old vanity
- Check plywood for rot
- Apply thinset, then lay down and screw in the concrete backer board (called Hardiebacker)
- Lay out one row over and one row down of tile to determine the arrangement
- More thinset and lay down the all the tile
- Grout
- Install new vanity
- Install new toilet
- Caulk
- Install new baseboard
Easy, right? Looks like a lot of steps, and yes, it will take several days, but no step is so crazy it doesn’t make sense, right?
Well, easy as it may appear, there are a lot of subtleties to doing this job. I’ll spare you the pain of taking you through every little thing I did. This isn’t a how-to blog, and since I’ve done this exactly once and I will likely only do this exactly one time, I’m by no means an expert. What I will offer are a couple of tips I learned (or was told) while doing this:
- Ask the folks at Home Depot for advice. They can be incredibly knowledgable and helpful. They like to give advice about this stuff, since they’ve done it thousands of times before.
- Write out all of the steps to do that job. Make a detailed list/plan so that you don’t miss anything.
- When hammering up the old tile with a hammer and a Wonderbar, make sure you wear goggles. You’ve only got two eyes. Googles saved my eyes multiple times.
- If the plywood under the tile is waterstained but the wood is not spongy, you’re safe. Lay the new backer board on top of it.
- The Hardiebacker board may feel like you can break through it easy, but you can’t. Use a saw.
- Measure three times, then measure again. Then cut. If you dare.
- Make sure your drill is fully charged. Drilling corrosion resistant screws into the Hardiebacker goes through a lot of juice quickly.
- Be aware that, if you’re replacing a vanity that predates your ownership of the house, when you pull it up you might just find the former owner’s teenager son’s porn stash in the false bottom (I kid you not).
- Use your level when setting the tile.
- When cutting the tile with a tile cutter and not a wet-saw, make sure you score the tile well and put the breaker bar as far up on the tile as possible for a clean break. Or misery will ensue.
- Marble is frickin expensive (see number 9 above).
- Clean the grout with a sponge as often as possible. Don’t wait for all the grout to be in before you begin cleaning the excess off the tiles. Otherwise, cue the misery.
- Make sure you have enough space at the back of your new vanity for your plumbing, especially if your vanity has drawers (and these days, they all do). You will be cutting out part of the back of the vanity. You do not want to be cutting through any part that the ball bearing glides for the drawers might need.
- Check the caulk before you check out at Home Depot. It’s not outside the realm of possibility that some idiot returned a half used tube of caulk to the store you shop at, and that Home Depot restocked it without checking it first, only to have you buy it without checking it first.
- However long you think something will take, double it. Then your halfway there.
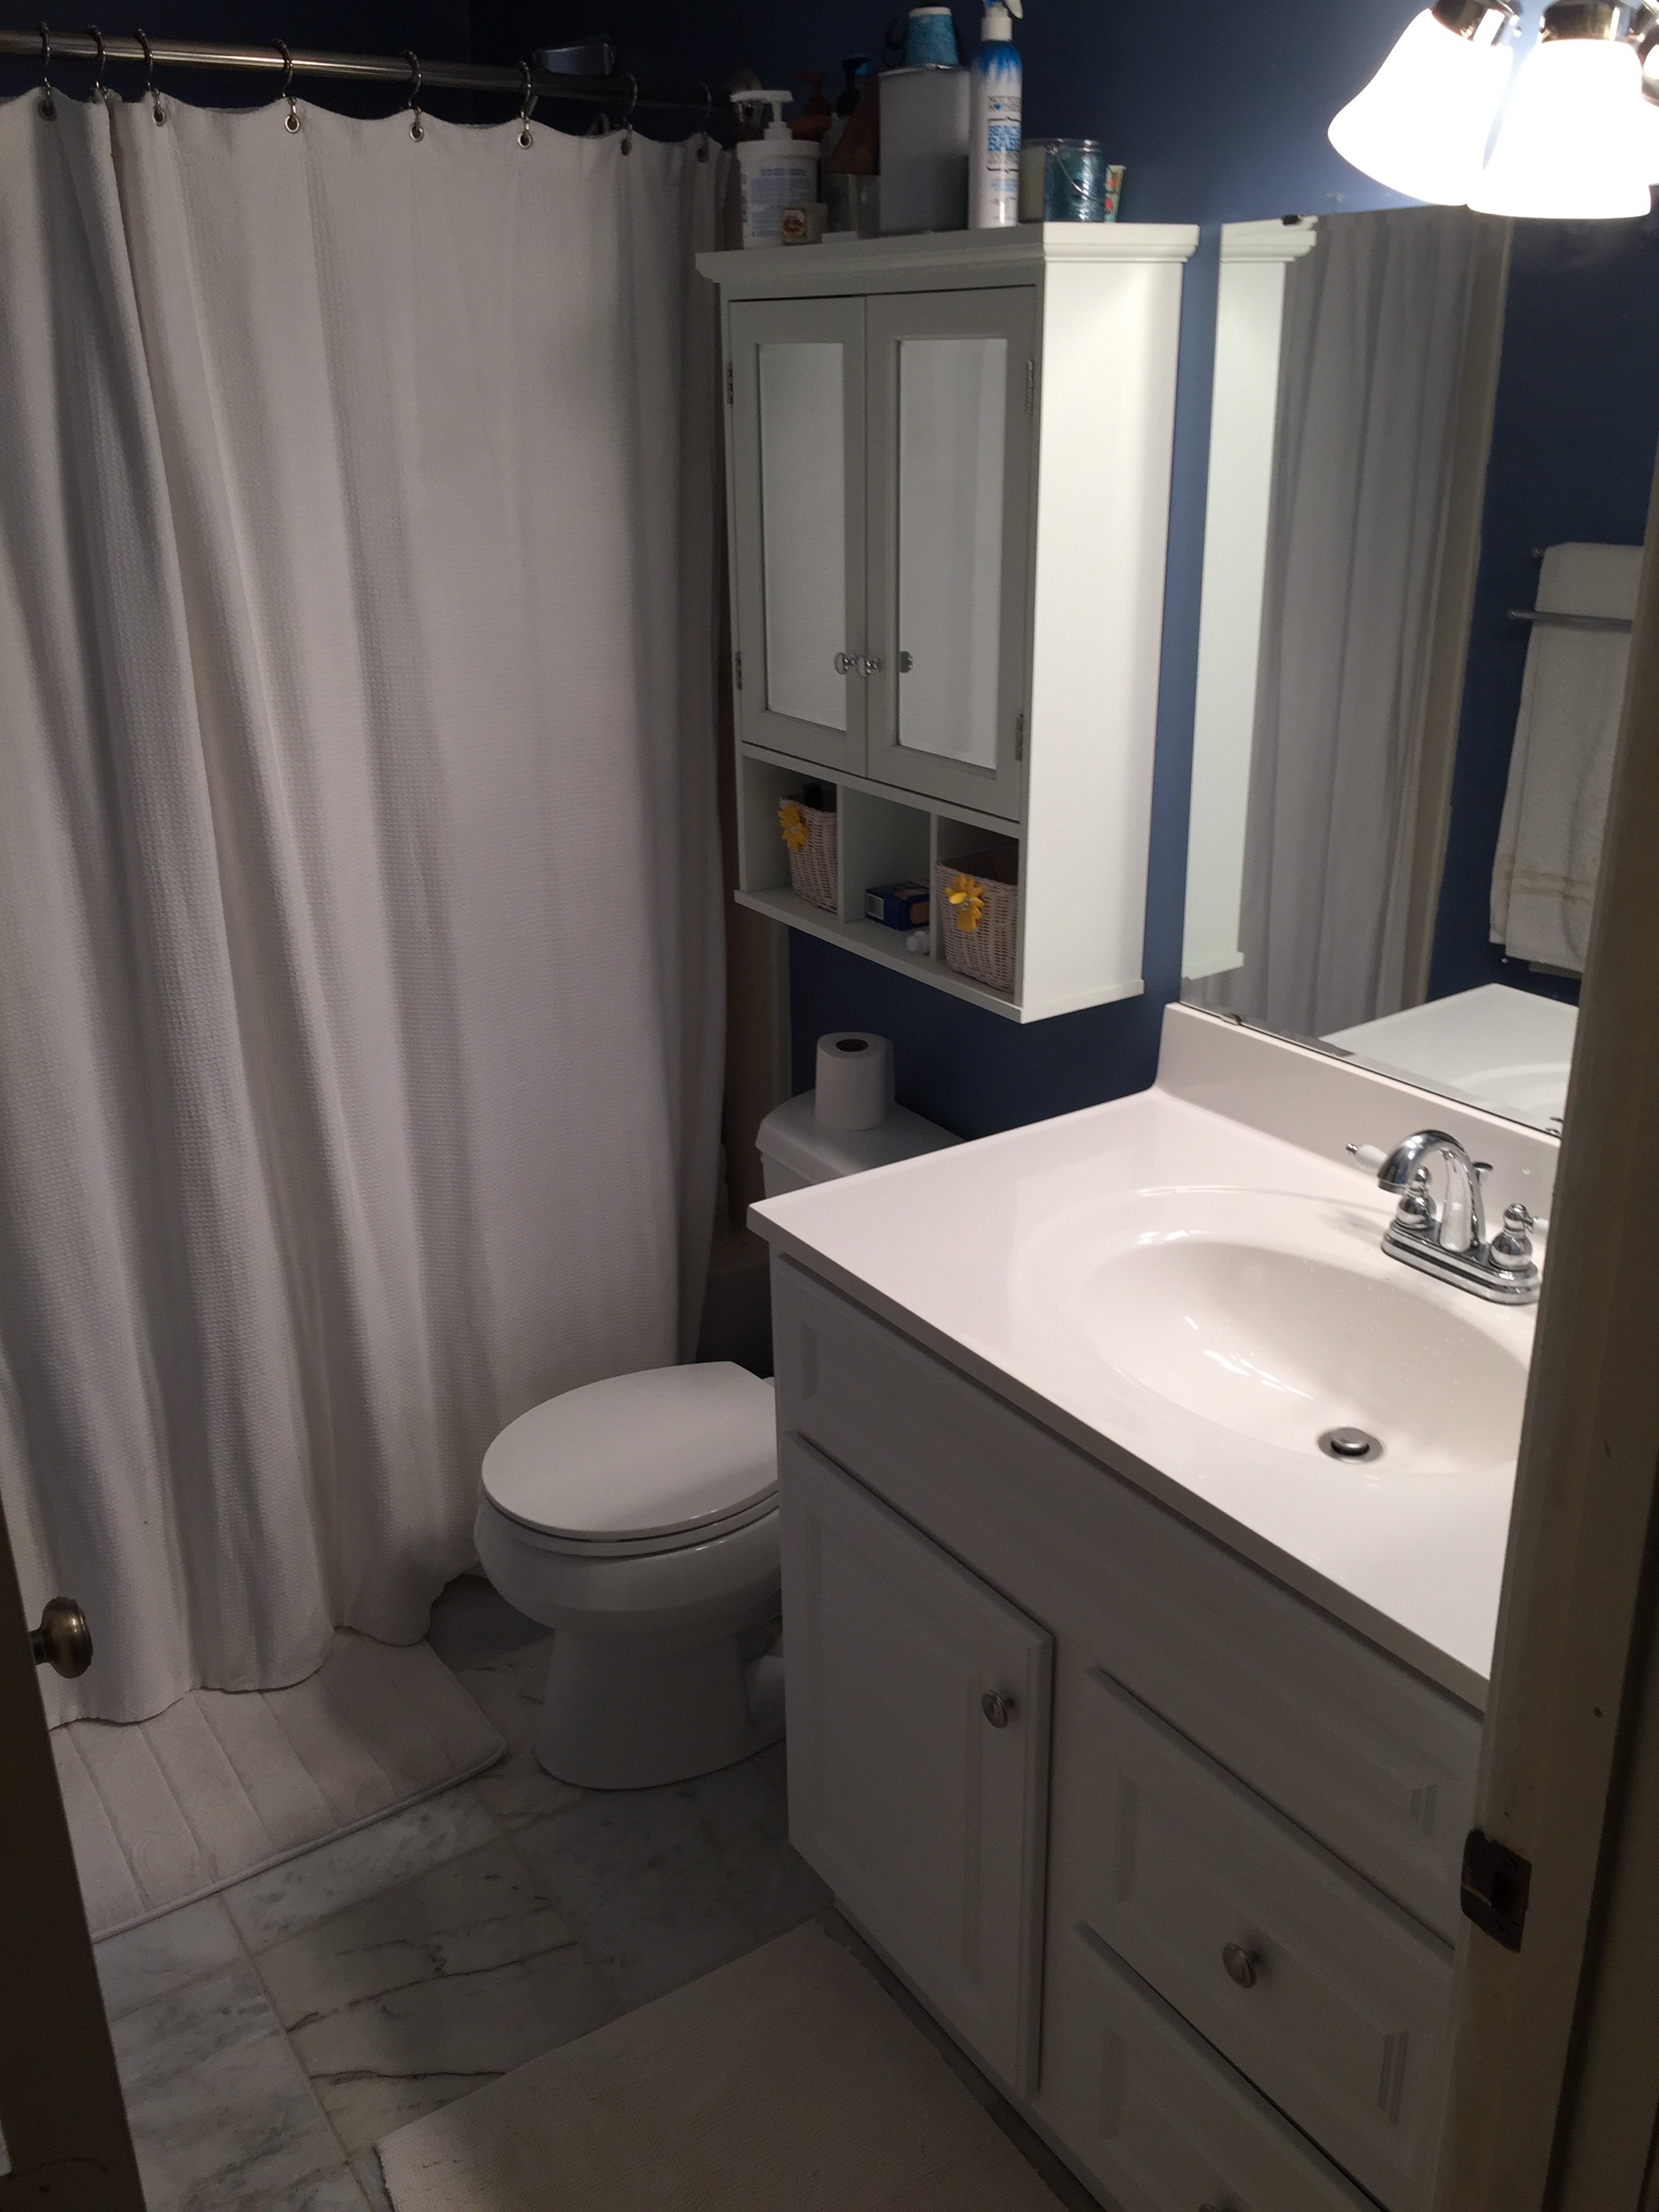
In the end, the bathroom turned out pretty well. There is still work to do. It needs a coat or two of paint. I still need to get new caulk and finish that up. Once the caulk is done, I can put the baseboard trim on. I need to scrape the ceiling and repaint it since its peeling. But this is minor stuff compared to what I spent two and a half days doing.
I’m pretty proud that I was able to accomplish it, especially considering I had no prior experience with this kind of work. In my mind, of course, I can see all the little things I did wrong. In my head all the little things I botched are huge glaring errors. But they’re not really. And I really do like how it looks.
Below you can see the before, during, and after pictures.
So, how was your weekend?


2 responses to “How Was Your Weekend”
Nice Job Scott! I laughed for a long while ath #8.
You’re crazy… but well done.